
Since the pandemic started, I’ve been getting into a lot of home decor projects. During the summer it was all outdoor projects, but as soon as it got cold outside I started painting my rooms and scouring Pinterest for decor ideas. This carved wooden headboard was all over the place:

This one in particular was sold at Urban Outfitters, but I think Anthropologie and other similar stores also sell this sort of thing. But I don’t like spending more than $10 on anything, so the only solution was to make it myself.
You will need:
- A reference image
- Measuring tape
- Paper
- Tape
- Ballpoint pen
- 4 two foot square foam boards (this depends on the size and shape of your design) – approx. $6 each at Home Depot or Lowe’s.
- A SHARP knife with a blade longer than the depth of the foam
- Toothpicks
- Cardboard (just cut up pieces of a cardboard box)
- Gorilla glue
- Hot glue (optional)
- Joint compound (I used Durham’s Water Putty)
- Sandpaper (120 or 220 grit)
- Latex paint
- Paintbrushes
First, decide on the size of your finished work. I wanted to make a headboard so I measured the width of my bed.
Find a reference photo online and blow it up to the size you need, then print it out to use as a template. I actually traced the design in Illustrator, but honestly that was probably unnecessary.
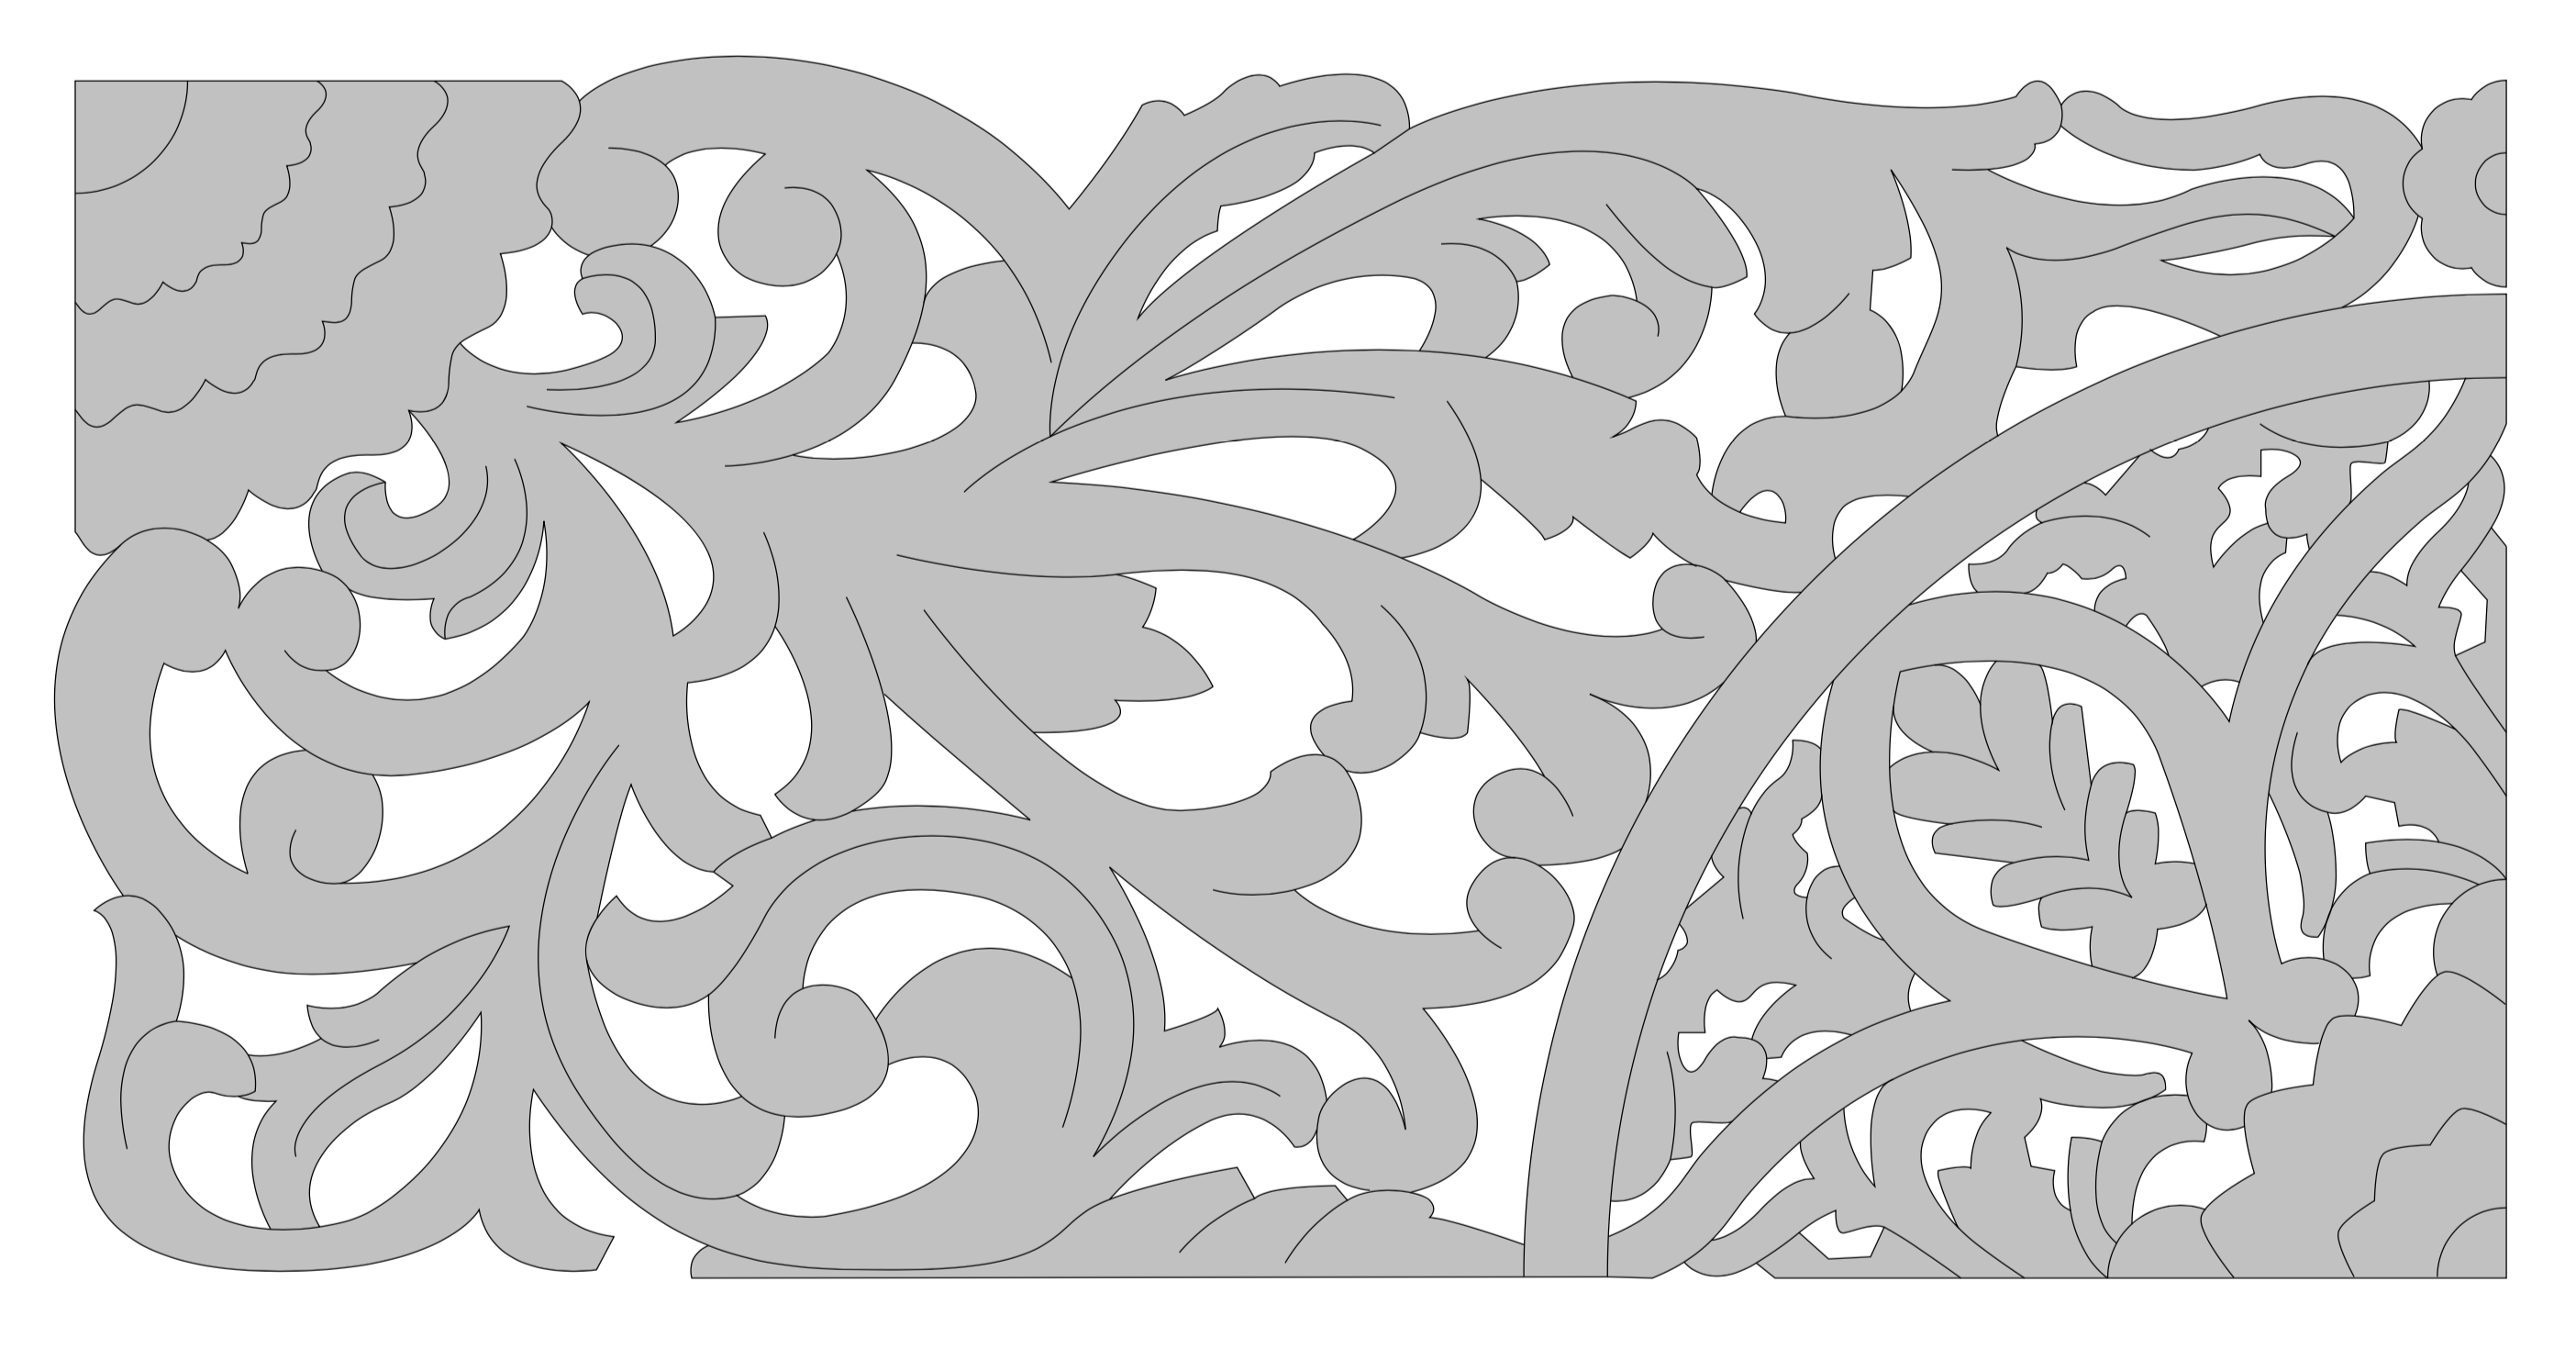
Tape the pages together and cut out the design so you can trace it with your pen. You could lay the paper on top of the foam and trace it with a ballpoint pen, then take away the paper and trace the slight indent that it left in the foam.

Time to do a lot of cutting. This took me WEEKS, but I was doing a lot of things wrong. First of all, my x-acto knife blade wasn’t deep enough to cut through the foam in one slice. Because of that, I had to cut from the front and then the back, and since I didn’t always put the knife in perfectly straight, the two cuts wouldn’t line up correctly and I’d get lots of messy cuts and foam flaps that I then had to cut off and sand down.

I didn’t have enough replacement blades, and when the blade started to get dull it would start tearing instead of cutting. It also does this obnoxious thing where if you push the blade all the way through the foam, it pops out a plug of foam instead of just cutting through cleanly. Also, because of all of this I ended up with a repetitive stress injury in my hand, so…try not to do that.

When you have all of it cut out, you’ll want to attach the parts together. You want to do this before you start carving and shaping the foam so that it looks seamless where it joins up. In order to join the pieces, shove a couple toothpicks into one side. The toothpicks will give the join some stability when you lift the whole thing up—otherwise the weight of the big floppy length of foam can break the bond, even if the glue is dry. I’ve heard that Gorilla glue is the best for joining two pieces of foam together, but I didn’t have any, so I used white glue, with a couple dabs of hot glue to hold it together while the white glue dried. I then glued on some strips of thick cardboard to the back along the seams to give it more stability.
WARNING: this foam melts with heat, so the hot glue is going to melt straight into the foam. If you get any on the surface, it will leave a nasty melted mess. It still does hold together pretty well, but it also runs the risk of just melting holes in the foam instead. A low heat glue gun might help, but I don’t have one so I can’t say for sure.
Once the glue has dried, look at your reference image again to see how you’re going to carve in all the details. At this point you’ve probably ended up with a flat surface and straight-edged cuts, but ultimately you won’t want to end up with any of the flat surface at all. It’s time to round the edges and cut in the details. Be careful with the joins, especially if you used hot glue. That stuff is tough to cut through.

You can fill in any remaining seams with joint compound. I used Durham’s Water Putty, which I really like. It comes in a powder form and you mix it with water to get the consistency you want. It dries quickly and very hard and is easy to sand and paint. Its main drawback is that it’s not water resistant and can easily dissolve if it gets wet, so make sure it’s sealed.
Next step: sanding. Wear a mask for this because it’s going to create a lot of dust. If you made the mistake that I did and used a too-short knife, you’ll have a lot of shavings and rough cuts to clean up. But if you did it the right way, this should be easy. I only had 80 grit and 400 grit sandpaper. 80 grit sandpaper removes a lot of foam quickly but leaves marks. 400 grit sandpaper is barely abrasive at all and is probably too smooth for foam. I think 120 or 220 grit would be perfect.
And now for the fun part: painting. WARNING: As tempting as it may be, especially with lots of little nooks and crannies to fill in, DON’T spray paint it. Spray paint contains acetone, and acetone melts foam as much as heat does. DON’T USE IT.

Since the foam is fairly hydrophobic, a lot of water-based paints will bead up on the surface. I ended up using a small jar of brown latex paint that I got in the oops paint section of Home Depot. I used a darker brown paint in the nooks and crannies, and then dry brushed on a champagne gold to highlight the edges. You might be able to spray on a sealer after it’s all painted, but I didn’t try because I was afraid of melting all my hard work.

And it’s done! The best part of this is that it’s so incredibly light that you could lift the entire thing with one finger. I think it weighs less than a pound. I attached it to the wall over my bed with some velcro picture hanging strips.
BONUS:
I used the remaining strips of insulation and the same process to make an allosaurus skull just for funsies.


