
After my last laser project, I was out of locations to make into topographical maps, which meant I had no idea what gifts to make people this year for Christmas. I knew I wanted to make something on the Glowforge because it makes my amateur art projects look really professional, but I had no idea what to make.
Then my sister-in-law linked me to Hazel Sebastian Glass, who makes gorgeous cut paper artwork that she posts on Instagram. Most of her stuff is done by hand but she does laser cut reproductions of her art as well. I can’t imagine cutting those designs out by hand. She must have a steady hand and an extremely sharp knife.

Anyway, that sounded like a great project to attempt with the Glowforge. I’ve also been wanting to try my hand at using epoxy resin. I watched this video on making epoxy resin pendants (side note: TheCrafsMan has a lot of videos on all sorts of different art projects and I love his sense of humor. Highly recommended!). Combining those two ideas sounded like a quick(-ish) project for Christmas.
Materials:
- EnviroTex Lite epoxy resin – It was affordable ($15 for an 8 oz kit) and available at Michaels. I know you can get more for your money if you buy in bulk but I didn’t know if this was going to turn out disastrous so I didn’t want to get gallons of the stuff.
- Bead Landing Found Objects frame pendants – I used the round ones, not these oval ones, but I can’t find the round ones on the website. Again, I only used them because they were available at Michaels. They’re pretty expensive for what they are ($5 for three pendants), so if I do this again I’ll probably try to find them cheaper elsewhere.
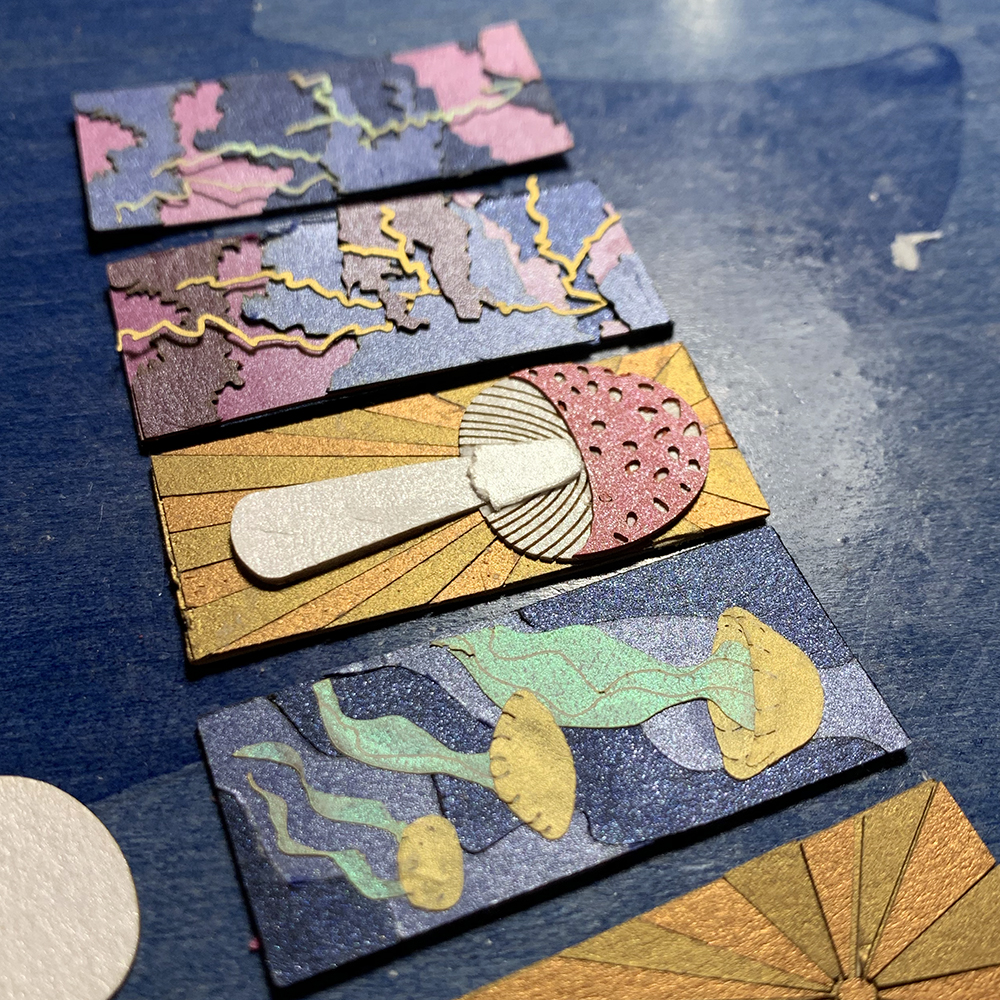
- Assorted paper – I used a variety of different weights and colors of paper. I’d recommend against using anything like construction paper, since the resin soaked unevenly into that. Cardstock worked better for me than lighter weight paper, since it was easier to assemble the teeny tiny puzzle pieces afterward (and didn’t blow around as much in the Glowforge)
- Krylon Triple-Thick Crystal Clear Glaze – This was to protect the paper from the resin both to keep it from changing color (which only partially worked) and to keep the paper from off-gassing little bubbles (which worked pretty well). I did about three coats on the fronts and backs of my assembled paper designs before adding the resin.
- Glue – I used a glue stick to put the paper layers together, which worked well because it didn’t make the paper wrinkly with moisture, but unfortunately it gets everywhere and dulls the metallic surface of the paper if it gets on it. Under a layer of resin, I think you don’t notice that as much. I tried plain white glue but that warped the paper since it was wet, so I had to weigh the paper down under books while it dried. It was especially bad with thinner paper but worked better with cardstock. Finally, once the paper layers were all glued together, I glued them into the pendant with superglue to keep it from floating when I added the resin. Maybe I could have used superglue for the whole thing. I might try that in the future, although I have a bad habit of gluing my fingers together.
Steps:
I made a few simple designs in Adobe Illustrator. I knew that I wanted a layer or two of a background, then at least two layers of the main design, since I felt that the different layers would look good set in resin. Since the pendants were only a little over an inch in diameter, the main design had to be simple enough to be visible from a distance, with large enough details that the paper didn’t just burn to a crisp in the Glowforge.

I assembled a half dozen little rectangular and circular paper designs, then chose the three of each shape that had turned out the best. I gave them a few coats of the Krylon to keep the paper from giving off too many bubbles into the resin. Once that was done, I superglued them into the frame pendants to keep them from floating when I added the resin.

Each pendant took only a very thin layer of resin and I ended up with a bunch left over, so I ran and got all of the extra (unsealed) paper discs I’d assembled as backups and set them all out on a paper plate, propped up on pennies. I poured the resin over those too.
After fifteen minutes, most of the bubbles had risen to the top of the cast. They’re easy to pop just by breathing gently across the surface. Then I covered everything with glasses to keep the dust off them and set a timer for myself to check every ten to fifteen minutes for more bubbles. I did this for perhaps two hours, until the resin was so thick that there was no way to pop any of the last bubbles.

Despite the number of bubbles I’d stirred into the resin, most of the casts cured crystal clear. They all had at least one tiny bubble, but it was minor enough that I was okay with it. I think the main issue with the ones set in the pendants was that air got trapped between the paper and the pendant, then released very slowly, so I ended up with a couple larger bubbles in the final casting. Perhaps if I was more diligent in gluing the paper down completely, that wouldn’t be an issue.

The paper that I had propped up on pennies didn’t have large bubbles because there was nowhere for air to get trapped underneath them, but they had hundreds of very tiny bubbles that came out of the paper, since I hadn’t sprayed those with the Krylon. It’s not noticeable from a distance but up close they look cloudy. Different types of paper gave off different amounts of bubbles. Construction paper was the worst offender. The construction paper also soaked up some of the resin, turning dark and wet looking. That would have been fine if it did that evenly, but it left dry-looking blotches.
The best looking one, with zero bubbles, was one that I had sprayed with Krylon but didn’t set in a frame. So that’s good to know.

I ended up doing the last bit of this project on the day before Christmas Eve, which was a problem because the resin takes longer to cure the colder it is. It takes 72 hours to cure at 70ºF, and my house is usually around 64ºF at this time of year. I set up a space heater in my bedroom and got the heat up to 90 degrees on and off for the next two days. They were very solid by Christmas morning.
Finally, I added cord to some of the pendants and keychain clasps to others. I’m curious to see how the resin holds up to bumping around with a set of keys. I’ve been using one on my keys for a few weeks now and so far it’s doing just fine.
These were the two finished pendants that I managed to get pictures of:


I’m really happy with how these turned out and I have plans to make some more. I certainly have plenty of resin left over. Any suggestions for designs?
